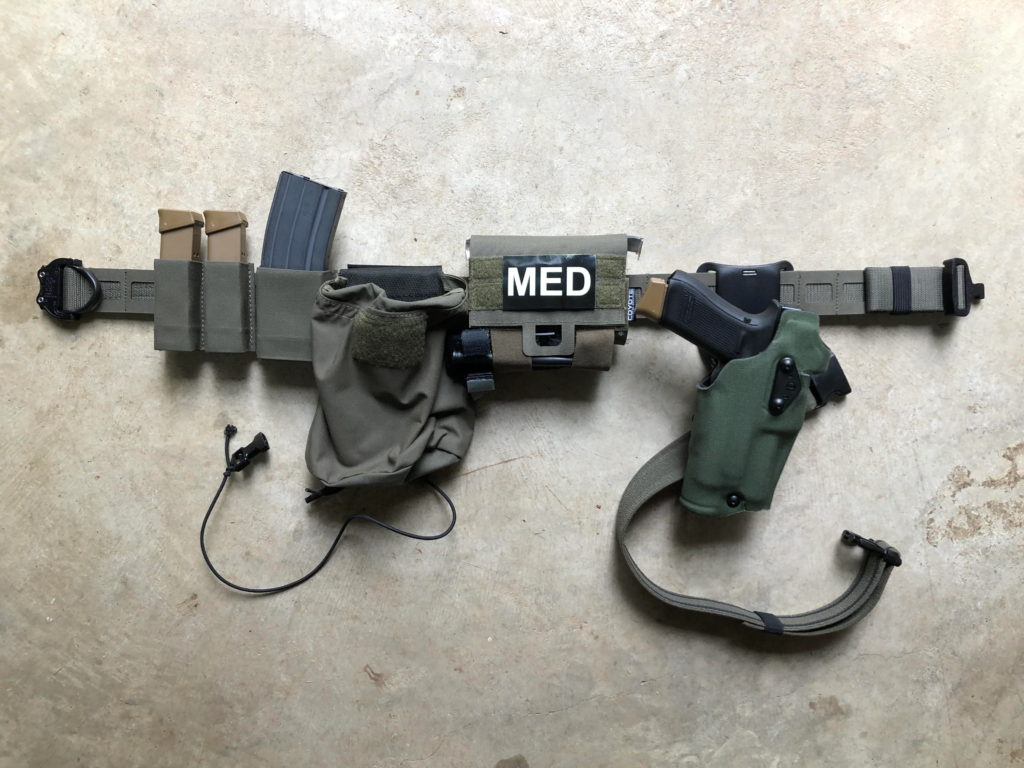
The Battle Belt
As I said last week in the Training post, I’ve had some eye-openers lately when it comes to firearms and in this post I’m going to share some more thoughts about the subject. This week’s topic is the Battle Belt survival belt, patrol belt, tactical belt, range belt call it what you will.
Let’s start with what a battle belt is. Simply put, a battle belt is a way to carry the gear you will want to have close at hand in a combat situation. A Batman belt if you will. It’s there to help you make holes and fix holes.
You might think, well that’s what my plate carrier or LCE is for. And you wouldn’t be too far off. The difference is the belt has a much lower profile and is typically easier to carry/wear for longer periods as it takes the weight off your shoulders.
Let’s take a look at battle belt set-up. There is no one-size-fits-all set-up for a battle belt. The configuration can and should change depending on your needs and mission set. That said, there are some basics that should be on your belt at all times.
A good holster, a couple of spare mags (for both your primary and secondary weapons) in appropriate carriers, a first aid kit, (we’ll get into that in more detail later), a bright flashlight and a knife. You don’t want to add too much stuff, that only adds unnecessary weight and bulk.
Where you put the stuff you’ve decided to carry is mostly personal choice, but once you determine what works best for you, stick with it. I say mostly personal choice, because your IFAK should be easily reachable with both hands, and that puts it in the small of your back.
When you wear your battle belt, you’ll want it high up, on the points of your hips. Too low and it can impede blood flow to your legs, too high and it will impede your movement.
I have a couple of different belt set-ups for different situations, but the overall positioning of the gear is always roughly the same. On my right hip is a holster for whatever pistol I’m carrying that day and a fixed blade knife. On the left hip, at least two pistol mag pouches followed by a rifle mag pouch (most of the time) then, still on the left side, a flashlight. At the small of my back I carry my IFAK and to the right of that I keep a good sized dump pouch. I tend to keep the front of the belt empty, I used to run my mag pouches forward but got a mag in the gut once, wasn’t pleasant.
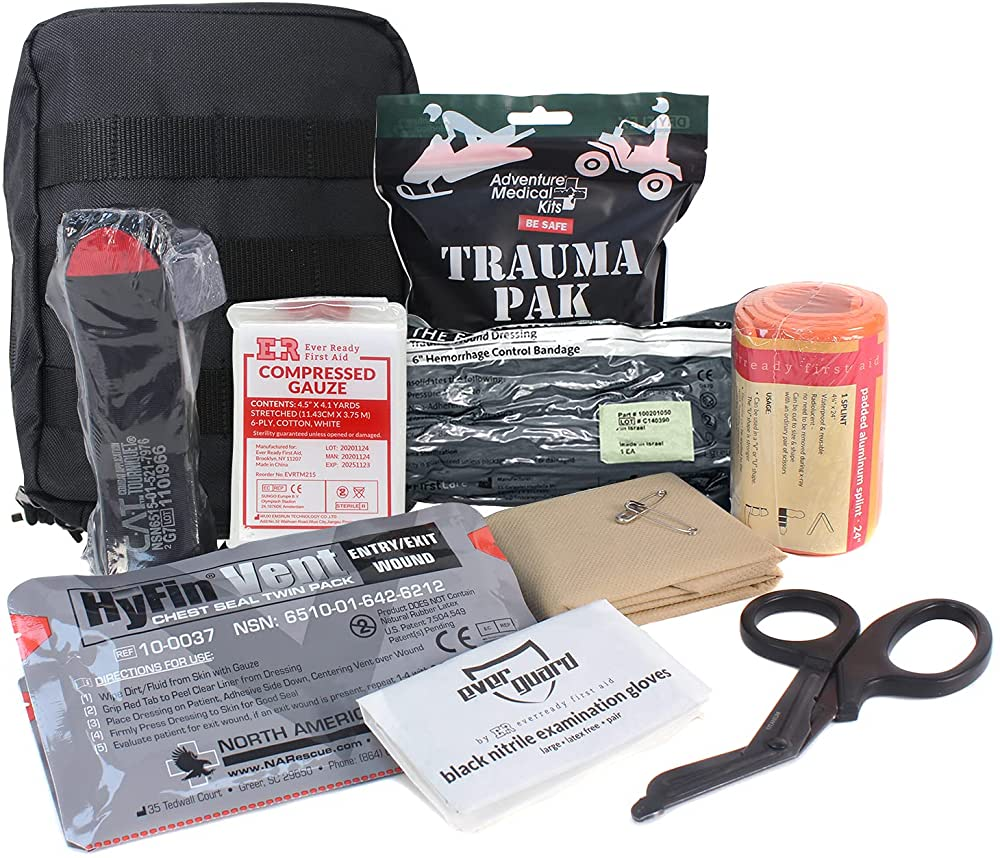
Now, for a few words about the IFAK. We’re not talking about a boo-boo kit, a few band-aids or whatever, we’re talking about a small trauma kit. It should include at a minimum a tourniquet, hemostatic gauze (quik clot or the equivalent), regular gauze, pressure bandages like the Israeli bandages, nitrile gloves, trauma shears and a permanent marker. If you have the room in your pouch you might want to add some ace bandages, a vented chest seal or two and some burn dressings. A flashlight is handy as well. All of those things are pretty self-explanatory with the exception of the marker, that you use to record the time of TQ application.
Once you have your belt assembled, get out and train with it. Validate your set-up, and if something doesn’t work for you, change it up. Move stuff around until it’s all comfortable for you to use.
While I am avoiding recommending specific gear, I am going to make one recommendation: Do not cheap out. Buy the best gear you can, it will last longer and perform better than the cheap LARP and airsoft stuff from Amazon and AliBaba.