Category: DIY

  • Hurricane Prep with Mr Wizard

    Hurricane Prep with Mr Wizard

    I’m not going to bore you with the advice you get from TV or the internet. This is specifically the pro tips. If you live in the hurricane zone, you should already know the basics. I’ll give them a quick pass below.

    1. If you take any meds be sure you have an ample supply.
    2. Have plenty of drinkable water on hand, at least 1 gallon per person per day.
    3.  Have a couple of hundred dollars in cash if you can, small bills. 
    4. No electricity means no ATM’s or cash registers for the most part.
    5. Fill your car up with gas, in case you have to make a run for it, no electricity also means no gas unless you are fairly creative.
    6. Have a cheap 5’x7′ blue tarp handy, don’t use your drinking water to flush the toilet. The day before the hurricane hits spread the tarp out in the bathtub and fill it with water. The tarp will help keep the water from seeping out through the drain. If you have a good rubber stopper the tarp isn’t necessary. 
    7. Have a damn first aid kit, I can’t stress this enough.
    8. If you have animals, be prepared to bring them indoors or at least shelter them and be sure to have plenty of food for them.

    Now we’ll get to the good stuff, a couple of Mr Wizard’s tips and tricks.
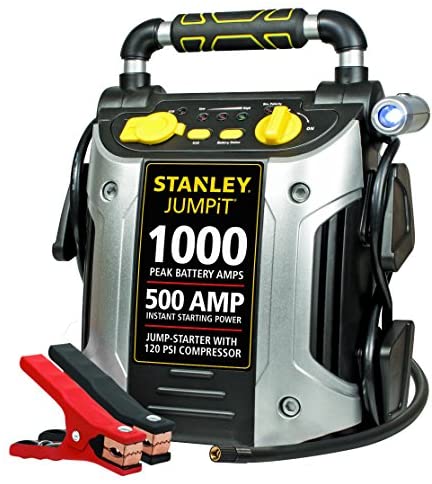
    Stanley Jump It, 1000 Peak Amp models run $75-$90 typically

    One of these can be the handiest item you have in a hurricane, I have a couple of these and bigger is better in this case. Stanley makes them in 300, 600, 700 and 1000 peak amp models. I have the Stanley’s, but Duracell and DeWalt also make good models. Don’t skimp on this one; buy the biggest one you can afford. Be sure it has at least 2 usb ports and a 12v lighter adapter port. One of these can be a difference maker in your sanity if you have a wife and kids at the house. One of these will charge a phone or iPad a dozen times or more. You can also use one to keep your WiFi up with a few simple instructions.  

    Using a small 12 volt to 115v DC/AC converter can keep your WiFi up in a pinch. Most of the time if our wifi goes out it’s because the power is out, not the cable. 
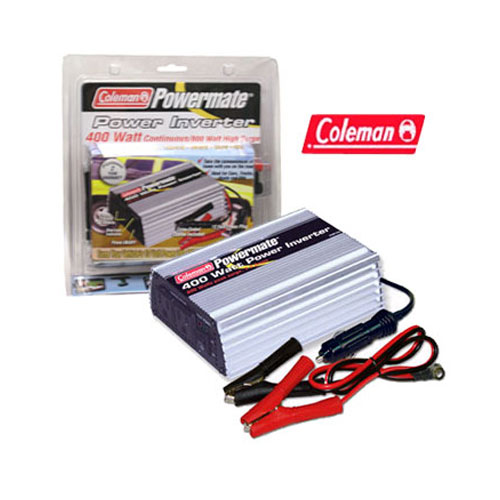
    400 watts is plenty for this job, plug your router and modem into the inverter and it will run your WiFi for a day or more.  Plug the power inverter into the battery pack and you are set. As an alternative you could have an “Air” card for your tablet or laptop, and it will also work as long as the cell towers are powered.
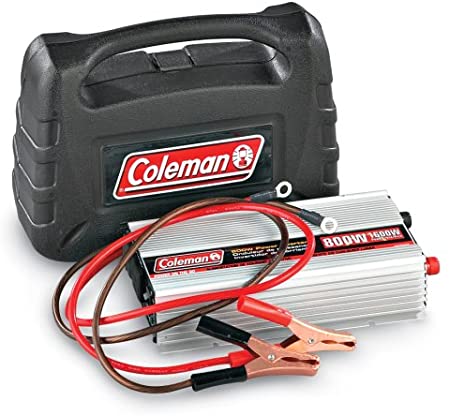
    800 watt inverter
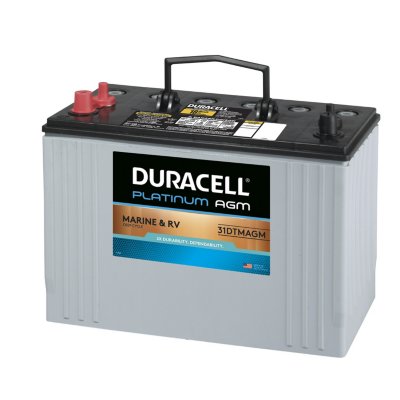
    RV/Boat deep cycle battery

    With a deep cycle RV/Boat battery and an 800 watt inverter you can run an average refrigerator for a day or so if you don’t open it a lot. If you have a boat or RV, you probably already have a deep cycle battery. I realize this isn’t practical for everybody, but I already had it so it made sense for short term power outages. Another tip is use this on the fridge and you won’t need to run a generator nearly as much. Use the battery and inverter on the refrigerator and use the generator to recharge the battery. 

    Now that WiFi and phones/tablets are out of the way, we’ll move on to washing and cooking. If you have a gas grill, you already know the drill especially if you have one with a side burner. Don’t guess, be sure you have a full tank of propane.
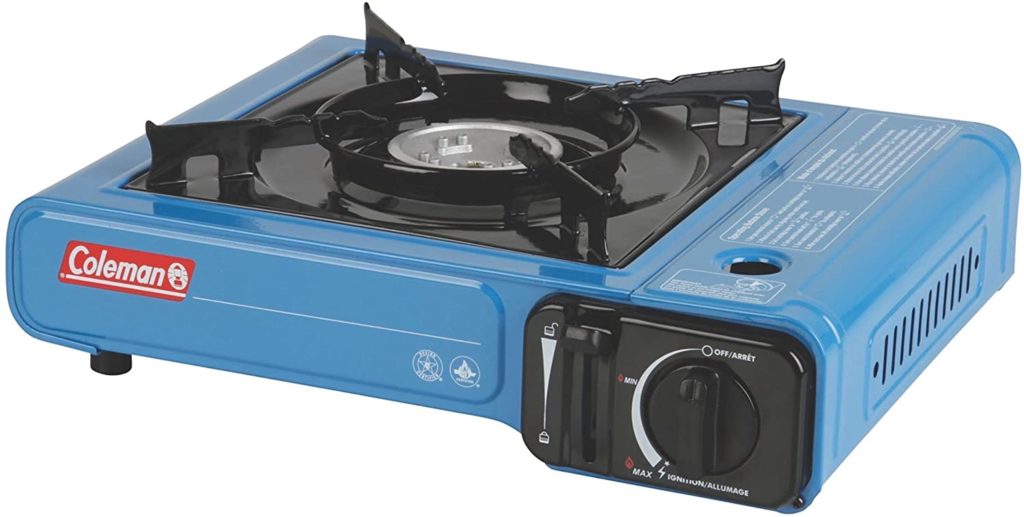
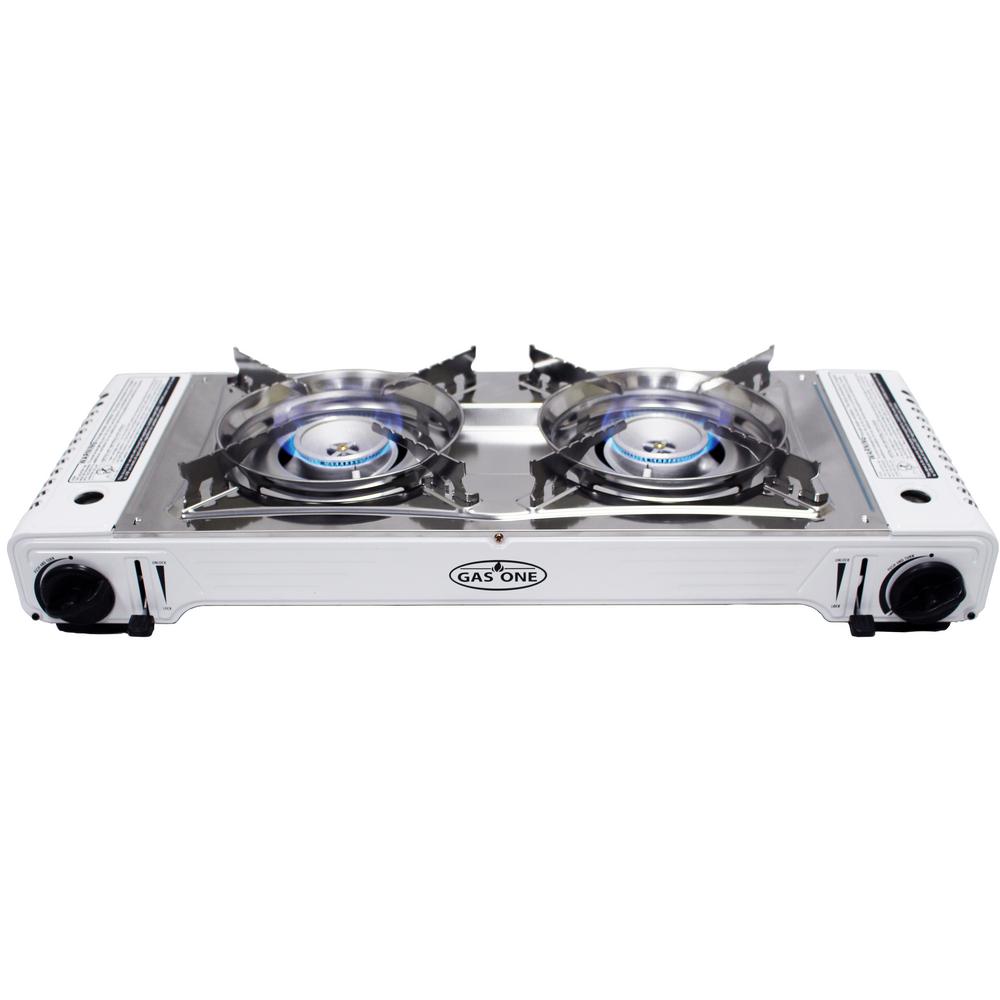
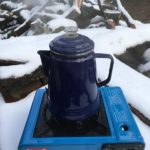
    If you are not a camper and already have a camping stove, the Coleman butane single burner stove is a good alternative, they run $20 or so and the butane cans run $2.50 or so a piece. You can get 4 for $10 at Walmart. Mr Wizard and the wife are grumpy without coffee, be sure to add a camping coffee pot to your kit if needed. These also come in 2 burner models but are $75 or more for good ones. They can also boil water or cook small meals easily. 
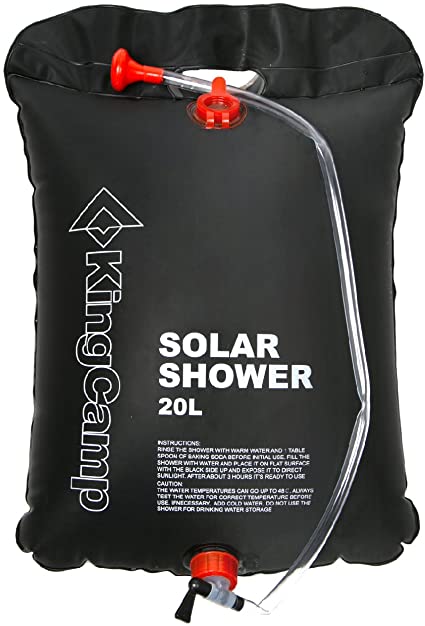
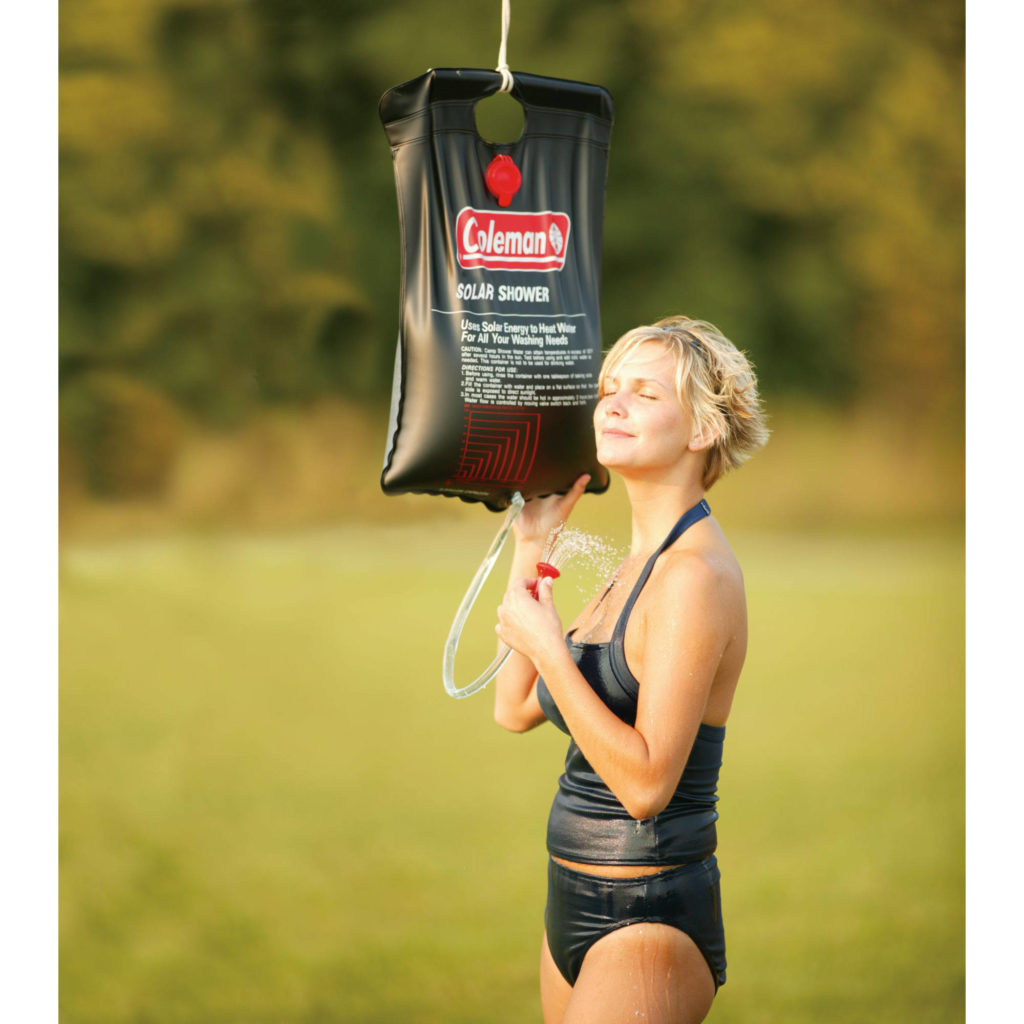
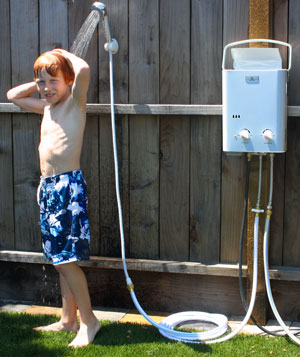
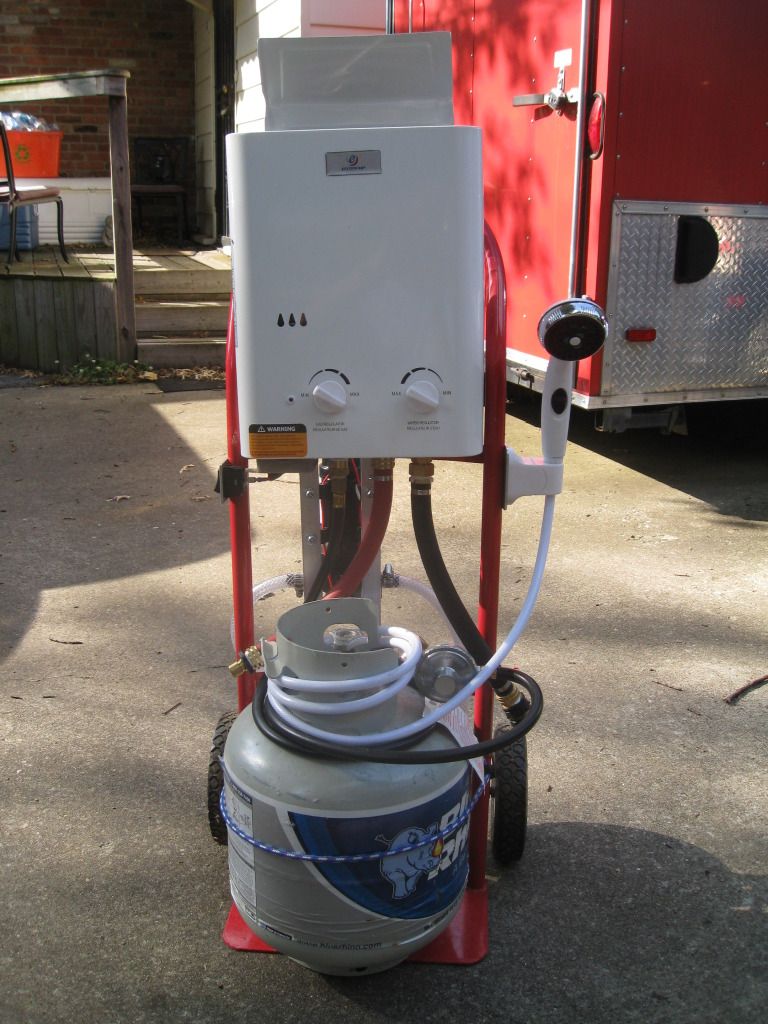
    Now we get to hot water.  After a couple of days everybody needs a bath. The cheap way is a solar shower, campers use them a lot and generally hurricane season is fairly warm weather. You can get them at WalMart or Amazon. These even work for condo and apartment dwellers if you have a balcony that sees a lot of sun.  Be prepared to take a “Navy” shower 20 liters doesn’t last long. The other alternative is an on demand propane hot water shower. If you have kids skip the solar shower and go with the propane shower. They will run on the small green propane tanks or a 20 lb bottle, if you already have a gas grill, it’s a no brainer they run around $100, and you can get one on Amazon or eBay. Get at least a 2.0 gallon per minute model. We use one in our camper, once you get use to it it’s great. Be careful the first couple of times you use it, they make some seriously hot water.  

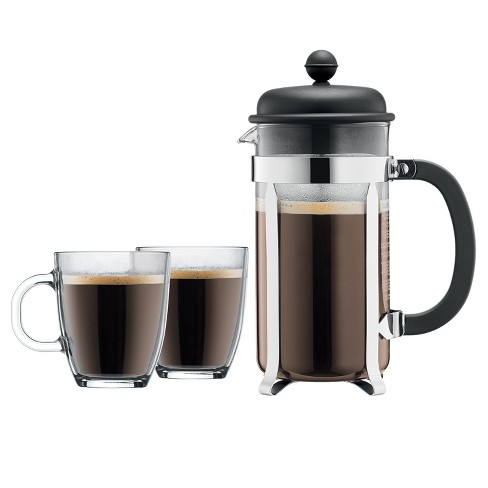
    If you are a coffee dog like Mr Wizard, there are a couple of options as long as you have hot water. Folgers Singles, it’s like a tea bag with coffee instead. The other option is a French Press; don’t go hog wild, a $20 press makes as good a cup as a $300 one. 

    There are a couple of other things to keep handy if it’s going to be a blower. Most houses have the same size windows on them, so keep a couple of pieces of plywood that will cover a window in case it gets broken. Nothing tears up a house faster than water damage. If you take a limb through a window during a storm it can be a real mess. A piece of plywood already cut to size can seal off the window until the storm is over and save a lot of damage. You can duct tape it from the inside or if it’s safe to go outside a couple of roofing nails or screws will hold it until the storm is over. Keep a couple of the heavy duty tarps around if you can, because if you lose a couple of shingles it will compromise the roof on your house, and after a good storm roofers are in high demand. If you can’t fix it yourself, a couple of tarps can save your house until the roofers can get to you. Keep the tarps and a pound of roofing nails where you can find them after the storm.

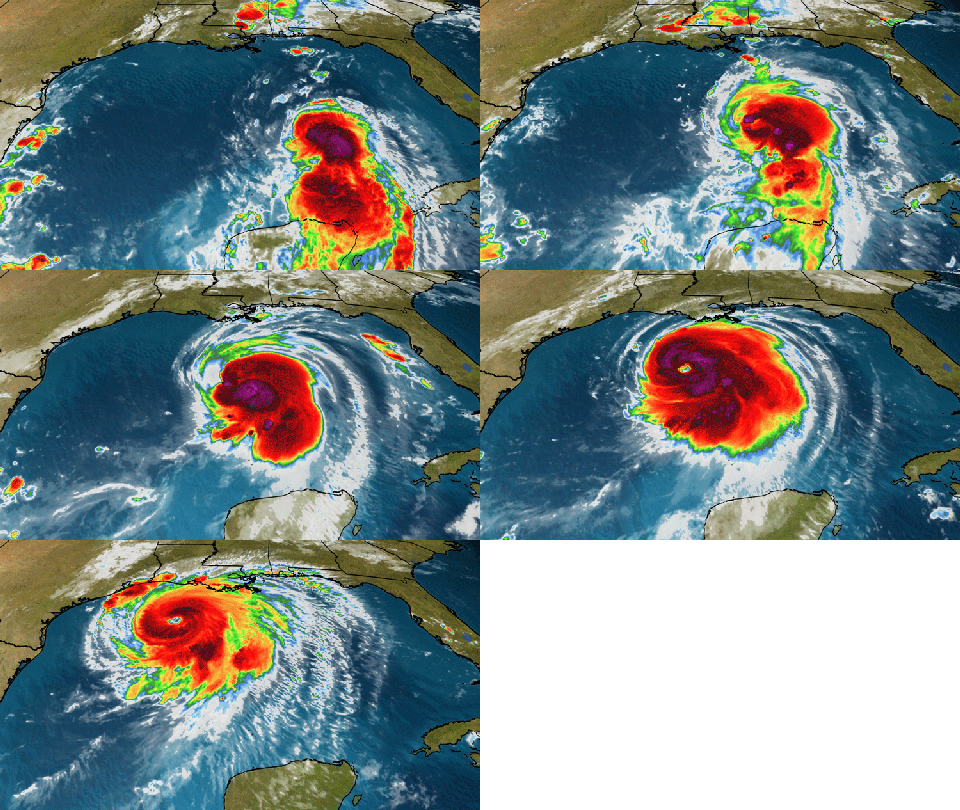
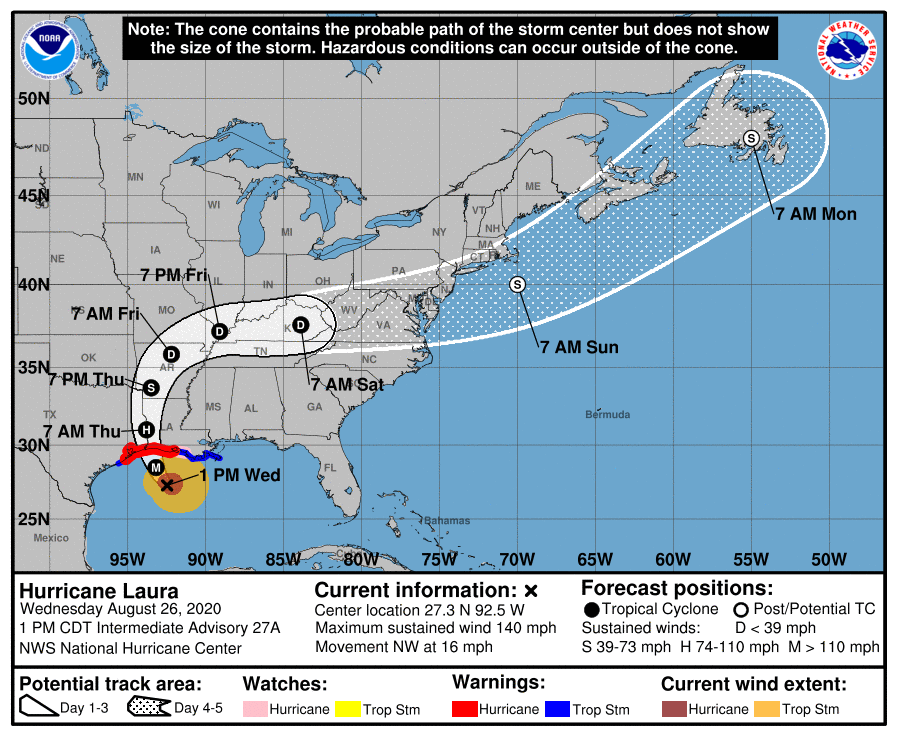
    This is a repost from a couple of weeks ago. Since this one is going to hit the Gulf Coast shortly, we thought it would be a good time to post it again.
  • DIY: Automotive Paint Scratch Remover

    DIY: Automotive Paint Scratch Remover

    Tonight’s DIY video comes to us from Todd Osgood at Project Farm.

    Todd tests all kinds of things on his YouTube channel. This episode features automotive paint scratch removal kits.

    Got any secrets for removing scratches from paint? Any experience with any of the products tested? Let us know in the comments.

  • DIY: Portable Fire Pit Grill (with a BONUS)

    DIY: Portable Fire Pit Grill (with a BONUS)

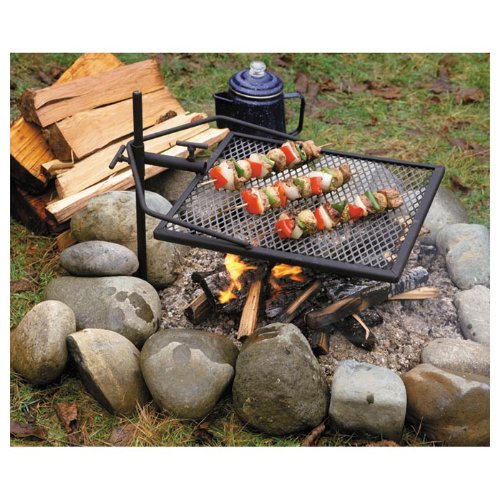
    Since it is summer, and many of us are cooking outdoors, and many more are enjoying camping vacations in order to socially isolate, I thought I would post a how-to video on making your own fire pit grill

    Yes, they can be store bought, with one that is similar to the product made in the video retailing at around $60.00 (featured image)

    But for those of you with workshops and pieces of scrap lying around, this is a fun and easy project.


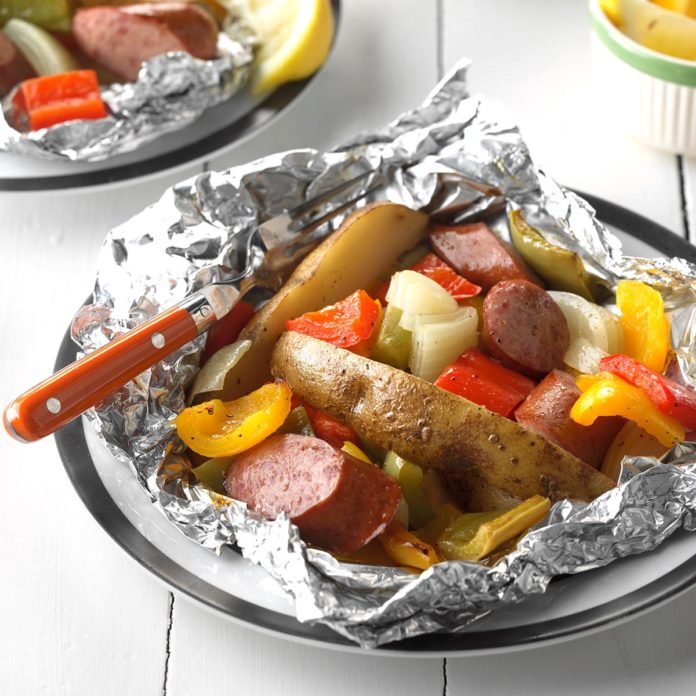
    Now here is the BONUS I promised you…an easy recipe to try out on that homemade fire pit grill…

    Potato-Sausage Foil Packs

    Ingredients

    • 1 medium green pepper
    • 1 medium sweet red pepper
    • 1 medium sweet yellow pepper
    • 1 package (14 ounces) smoked turkey kielbasa, sliced
    • 2 large potatoes, cut into wedges
    • 1 medium onion, chopped
    • 4 teaspoons lemon juice
    • 4 teaspoons olive oil
    • 1/2 teaspoon garlic powder
    • 1/2 teaspoon pepper
    • Lemon wedges, optional

    Directions

    • Cut peppers into 1-in. pieces; place in a large bowl. Toss with the next 7 ingredients. Divide mixture among 4 double thicknesses of heavy-duty foil (about 18×12 in.). Fold foil around mixture, sealing tightly.Grill, covered, over medium heat until potatoes are tender, 30-35 minutes. Open foil carefully to allow steam to escape. If desired, serve with lemon wedges.

    Nutrition Facts
    1 serving: 344 calories, 10g fat (2g saturated fat), 62mg cholesterol, 990mg sodium, 42g carbohydrate (8g sugars, 6g fiber), 21g protein.

    Source: www.tasteofhome.com

  • DIY: Firearm Conservation

    DIY: Firearm Conservation

    No, we’re not talking about safe queens, we’re talking about how to stop the decay and how to stabilize your older firearms.

    Mark Novak owns and operates Anvil Gunsmithing in Charleston SC. He has contributed to C&Rsenal’s YouTube channel. He recently, because of demonitization issues branched out on his own, while still associating with Othais and Mae.

    The video we’re presenting tonight is a bit long-ish, but well worth the time if you own any classic firearms.

    This editor was inspired by a project Mark and the team at Anvil undertook. I’m currently on the lookout for a SMLE to convert into a “truck gun”. Perhaps you’ll see that video soon. . .

  • DIY: Oddly Effective Ways to Hide Things.

    DIY: Oddly Effective Ways to Hide Things.

    As I was looking for a topic for this week’s DIY, I came across this video.

    I found it very interesting.

    Most of the ideas are truly unique and clever.

    However I will dispute two of them as being particularly original, as they have both been written about both in real-life anecdotal stories, as well as mystery/crime fiction.

    I will let you guess as to the two ideas I found unoriginal.

    So MVAPers….What do you think of these ideas?

    Clever?

    Or Idiotic?

    Personally, I would be one to forget where I hid everything……so I will just stick with a traditional bolted down key/combo safe, and a commercial bank safety-deposit box.

  • No ammo at the local gun store?

    No ammo at the local gun store?

    If you haven’t started thinking about reloading your own ammo, you should.

    I’m not going to try to cover every facet of reloading here, just some of the basics and the pros and cons of reloading your own ammo.

    The choices start with do you shoot enough to make it worthwhile?

    1. If your main calibers are 9mm, 45 ACP, 38/357 mag or .223/5.56, bulk purchasing may make more sense for you than reloading. I belong to one of the largest gun clubs in the state, current membership is about 500 members. We have relationships with a couple of wholesalers and make bulk ammo purchases a couple of times a year, currently it’s mostly 9mm and .22LR. We can generally get 10% to 15% off of most ammo, sometimes more.
    2. If you live in a place that you don’t have a lot of choices for local purchase, look to online purchases, I use a couple of outlets Target Sports USA, Natchez Shooters Supply, and Academy Outdoors all three offer free shipping with most orders over $50 or $99. Get on their email list, and watch for specials in the calibers you shoot. A word of caution, it’s my opinion only. I don’t shoot steel cased ammo in any gun no matter how cheap it is, two reasons, it’s hard on guns and it’s not practically reloadable. I save just about all the brass I shoot, even if I don’t reload a particular caliber, one of my friends probably does.
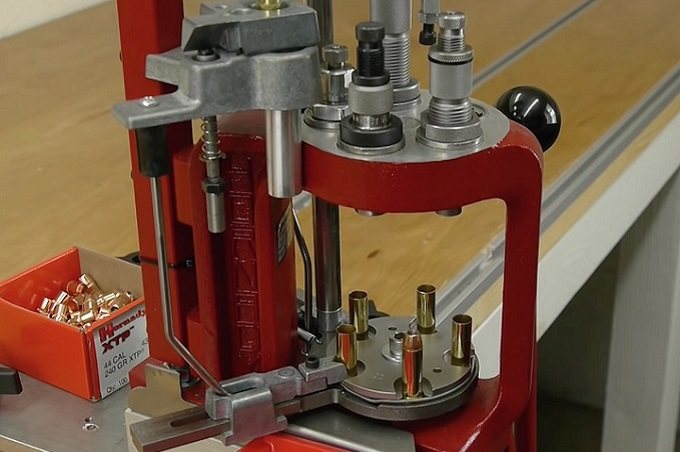
    3. When I first started competition shooting, the volume of ammo that you go through is astounding to most people. Until I had my own progressive reloading setup I did structured purchases with a couple of shooting friends and used one guy’s Dillon progressive press for loading thousands of rounds of 45 ACP and 38 Special. We all bought the same components and saved as much brass as we could. One or two nights a week would cover most of our needs, 3 or 4 guys taking turns loading and boxing up ammo makes it go a lot faster.
    4. If you live behind the Iron Curtain of gun rights (especially CA, NY, NJ etc.) , soon you may not have much choice. CA is testing the limits of the 2A and Interstate Commerce Clause with their latest bs, hopefully it will be overturned by the federal courts, but that may take years. In the meantime reloading and components haven’t been included yet.
    5. If you shoot the rare or unusual calibers, reloading is your friend. I can typically load a box of 44 Magnum for about $8 with cast lead bullets, retail is about $40 per/50 box. Reloading 45LC, 10mm, S&W 500, 45-70 etc. can realize substantial savings. Reloading also allows you to generate custom ammo for a particular application, such as hard cast bullets for hog hunting.

    Basic reloading kits start at $150 for a single stage press, to about $250 for a progressive press kit.

    https://www.amazon.com/LEE-PRECISION-Breech-Lock-Challenger/dp/B003ISVWC6/ref=sr_1_5?keywords=reloading+kit&qid=1568300056&s=sporting-goods&sr=1-5

    https://www.midwayusa.com/product/1013020237?pid=785993

    Don’t be hesitant about buying used presses or dies, they are practically indestructible. If it looks to be in good shape, it probably is. I have a couple of presses that have been in use for 20 years or more, a Hornady 366 shotshell reloader and a Lee Turret press, both have loaded thousands of rounds without any trouble. I always buy carbide dies when possible especially for pistol calibers. If you hit yard or estate sales once in a while, keep an eye out for reloading tools and presses frequently you can buy it for pennies on the dollar.

    Things not to skimp on.

    1. Get a digital micrometer, you can load with out one but don’t. It will save you a lot of trouble in the long run. All rifle and pistol cartridges have a minimum and maximum OAL (Over All Length), too short and you will get light primer strikes to FTF (Failure To Fire), too long and it won’t chamber or go into battery. It doesn’t have to be an expensive one, these work fine https://www.amazon.com/Frankford-Arsenal-Electronic-Caliper-Reloading/dp/B0018E9FVC/ref=sr_1_2?keywords=franklin+arsenal+micrometer&qid=1568301292&s=gateway&sr=8-2
    2. Use a digital scale, trust me on this one, it’s just faster than using a balance beam scale and is just as accurate. They don’t have to be expensive, a $35 one is fine if you are just checking charge weights. https://www.amazon.com/Hornady-050106-Battery-Operated-Electronic/dp/B017S6PPNU/ref=sr_1_9?keywords=franklin+arsenal+digital+scale&qid=1568301468&s=gateway&sr=8-9
    3. If you are reloading pistol rounds, get a case tumbler/cleaner. It’s a lot easier to reload precision rounds in clean cases. It’s not a must have and there’s plenty of kits/plans on how to make one online if you don’t want to buy a commercial one.
    4. Get a relatively recent reloading manual, all of the powder companies have them as well as bullet makers and reloading tool makers. I use the Sierra manual mostly, as I like the layout and its in a 3 ring binder that I can add pages to. These run $10+ on eBay, you don’t necessarily need a new one unless the caliber or components you want to use are not covered in an older one. For the Sierra manual the 5th Edition is the most current and runs about $30 online. You should also make use of the online guides from the powder suppliers and bullet makers.

    Now for the don’t do it part.

    1. If you have ADHD, skip it, reloading requires attention to detail. Likewise drinking alcohol, smoking pot, watching tv while you are reloading is a bad idea. I generally listen to the radio while reloading.
    2. Use the manual, it’s there for a reason. Nobody wants to be known as Old Three Finger, use some common sense.
    3. Do not substitute components, yes I know people do it and survive. If you are reading this and thinking about starting reloading, you don’t have enough experience to know what you can get away with and what you can’t. This especially applies to primers, never substitute pistol primers or powder.
    4. Have a safe place to work and store your components. Again use some common sense, I don’t have kids at home anymore, but gunpowder is an explosive, store it correctly and out of reach for children, same with primers. Wear safety glasses or at least shatter proof prescription glasses, nothing gets your attention like setting off a primer two feet from your face, it doesn’t happen often, but don’t lose an eye over it.
    5. Realistically if you are mostly shooting 9 mm and .223/5.56, it’s cheaper and easier to just buy the ammo, it would take forever to make up the savings after shelling out $300-$500 for a complete progressive reloading setup. The only reason I would do it now was lack of availability. You can get a basic reloading kit going for about $100 with some judicious shopping and some eBay scrounging, if it’s just to load some ammo for the expensive calibers, jump in. Paying $1/round really shortens up the fun time shooting big pistol calibers. Do I actually save a lot reloading? Not really, but I do shoot a lot more for the same price.

    Times have changed, depending on your outlook, this is the 3rd or 4th ammo shortage in the last 10 years. Don’t forget the Democrats constantly sponsor bills that would increase the sales tax on ammo from 30% to even 50%, which on the cheaper ammo wouldn’t keep anybody from shooting, but it would seriously dent big caliber shooting, 44 Mag runs almost $45 per box for hunting ammo, it would suddenly cost $60 or more.

  • How to build your own truck gun vault

    How to build your own truck gun vault

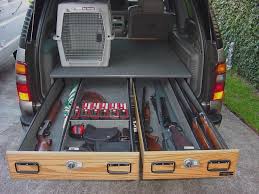
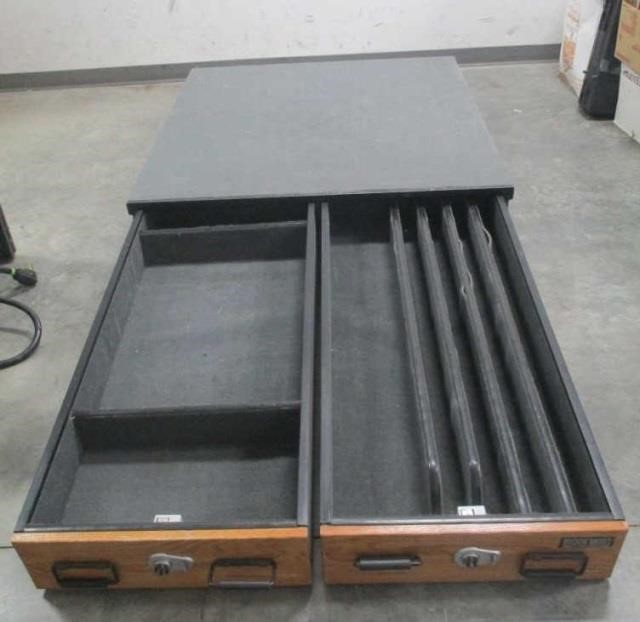
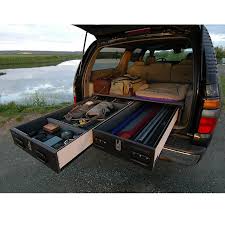
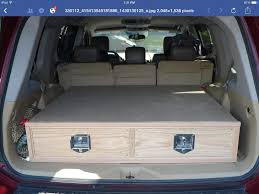
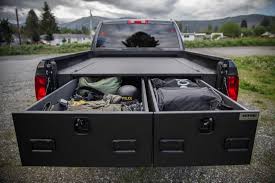
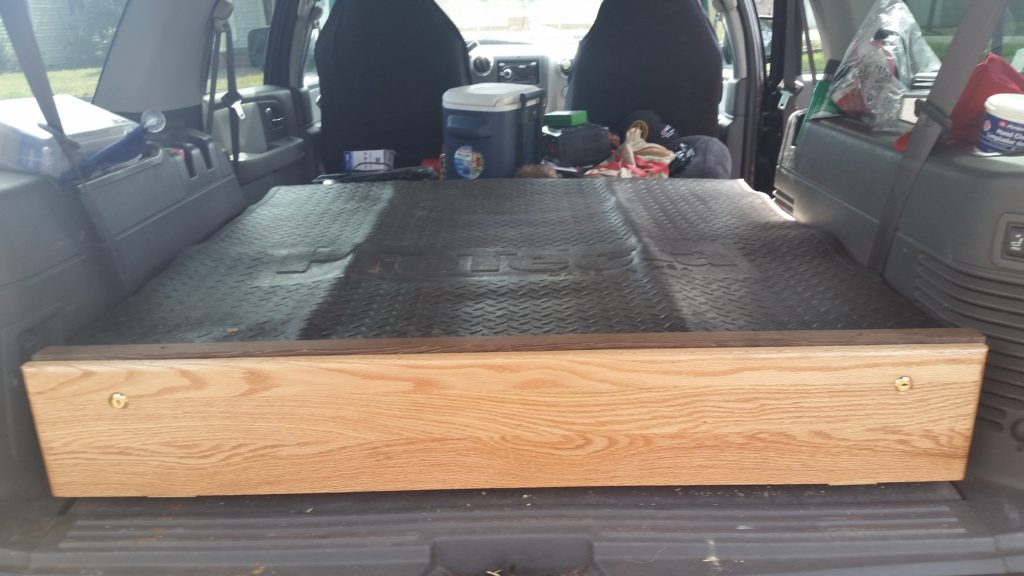
    If you travel with guns, sooner or later you think about a gun vault. The ones above are some good examples. Most full and mid size SUVs will take a 48″ wide box behind the second row seats. I have built a couple of these for Expeditions, Suburbans and a few other mid size SUVs. Done correctly, it’s practically invisible from the outside and covers the state laws about transporting firearms inside a truck or SUV. 

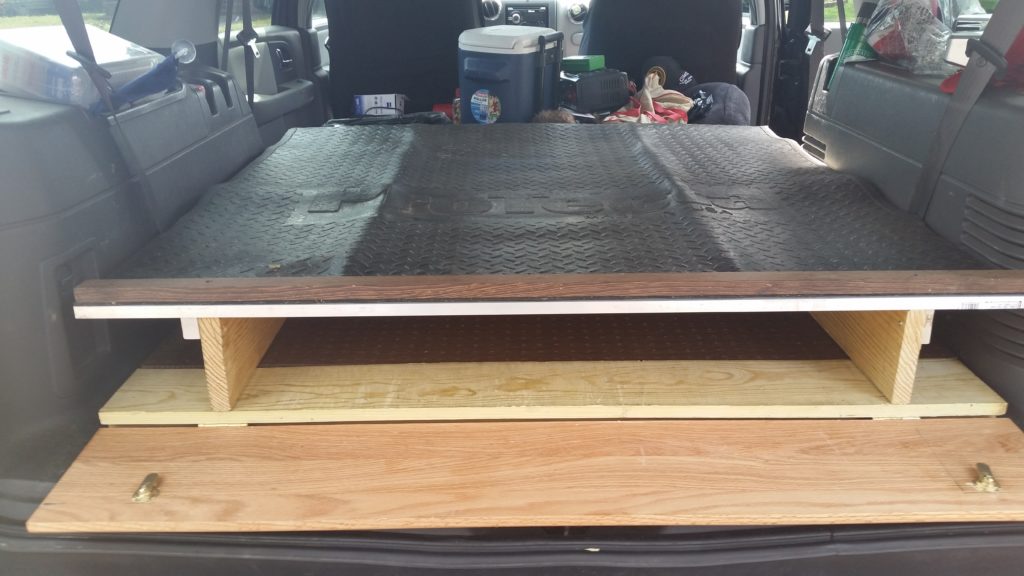
    Commercial vaults can run $1200 or more. If you are the least bit handy, you can make your own. I built this one for a trip to San Antonio. Gun theft is rampant there as it’s the home of the Skeet and Sporting Clays associations and they have a couple of 5 day tournaments there. It’s well publicized and the criminals know there are hundreds of high end shotguns on the grounds. Restaurant and hotel parking lots are also hit often.  The construction is pretty simple; it’s a box with a door. I built mine in an afternoon. Understand that truck and SUV vaults are not theft proof; the goal is to make it not worth the time or exposure to do it. My current vault is built out of two sheets of 1/2″ 4×4′ cabinet grade plywood, 3 1×6″ pine boards, and a 1×6″ oak board for the door. It’s screwed together with #8 2″ deck screws. Trust me, hinge the door from the bottom. The locks on the first run were simple cabinet locks, but once they were installed I didn’t like them that much, so the third photo shows the boat hatch locks I replaced them with later. 

    I finished the top of mine with a piece of a truck bed liner. If you are doing this in a pickup truck it’s a must if you really want a waterproof box. Be advised it’s recommended to use treated plywood if you are building one for a pickup bed without a topper. I generally transport my guns in hard cases so I didn’t want drawers; I just needed a place to get them out of sight. It’s basically a second story for an SUV deck. 

    Some of my friends have built everything from mild to wild – with slide out tables, or workbenches from the bottom, or full length drawers on teflon sliders. I can get either 2 guns in hard cases, or 4 guns in soft cases, plus 3 cases of shotgun shells in mine.